

How to Clean 3D Prints: Step-by-Step for PLA and PETG
Quick Summary
To clean 3D prints, remove the support material and rafts, trim strings and brims with flush cutters and a hobby knife, then wash PLA and PETG in warm water with mild dish soap. Resin prints need a separate wash in isopropyl alcohol before curing.
- Remove supports slowly and trim leftover stubs close to the surface with flush cutters.
- Wash PLA and PETG in warm water with a few drops of mild dish soap, then dry fully.
- Avoid harsh solvents and stiff brushes, which can dull surfaces or scratch fine detail.
- Wash resin prints in isopropyl alcohol and let them dry fully before curing under UV light.
- Never pour used alcohol or liquid resin down a drain; dispose of resin waste as local rules require.
Table of Contents
- How to Clean 3D Prints: Step-by-Step for PLA and PETG
- What You Need Before You Start Cleaning a 3D Print
- Step 1: Remove Support Material and Rafts
- Step 2: Trim Strings, Brims, and Sharp Edges
- How to Clean 3D Prints PLA Without Damaging the Surface
- How to Clean Up 3D Prints PETG and Resin Residue
- Sanding, Deburring, and Preparing Parts for Paint
- Troubleshooting a Clean Print and Your Next Step
- Frequently Asked Questions
How to Clean 3D Prints: Step-by-Step for PLA and PETG
Last Updated: November 14, 2026
What You Need Before You Start Cleaning a 3D Print
Knowing how to clean 3D prints well makes the difference between a figure that looks like a finished product and one that looks rough. The right tools and a clear order of steps save time and protect the surface.
Before you start, gather a few basics. Most clean-up work needs only simple, inexpensive supplies.
- A pair of flush cutters or nippers
- A hobby knife or deburring tool
- Fine sandpaper, roughly 220 to 400 grit
- A soft brush and a lint-free cloth
- Protective gloves
- Warm water and mild dish soap for PLA and PETG
- Isopropyl alcohol and a sealed container for resin prints
Your first decision is the printing process. FDM prints (PLA and PETG) and resin prints need different workflows. FDM parts are cleaned dry or with water, while resin parts need to be washed in alcohol to remove uncured resin.
Resin work also needs extra care. Wear gloves and work in a ventilated area, and keep uncured resin away from skin. Dispose of used alcohol and resin waste according to your local rules. Never pour them down a drain.
Step 1: Remove Support Material and Rafts
Start by removing the parts that were only there to hold the print up. Support material and rafts are the first things to come off.
Gently work the part free from the build plate first. For PLA and PETG, a flexible scraper or spatula slid under the raft usually does the job. Go slowly so you do not crack thin areas.
Next, break away the supports. Hold the model steady with one hand and pull the support away from the part with the other. Snap larger supports at their base where they meet the model.
Here are a few tips that help:
- Work the support loose slowly rather than yanking it
- Use flush cutters to trim any leftover stubs close to the surface
- Check hollow or detailed areas for trapped supports
- Keep small support pieces out of reach of children and pets
Set aside all removed material. You may want to recycle clean PLA or PETG scraps later.
Step 2: Trim Strings, Brims, and Sharp Edges
Once the supports are gone, deal with the extra plastic. Strings are thin threads left between parts during printing. Brims are flat rings that stick to the bed for grip. Both need to go.
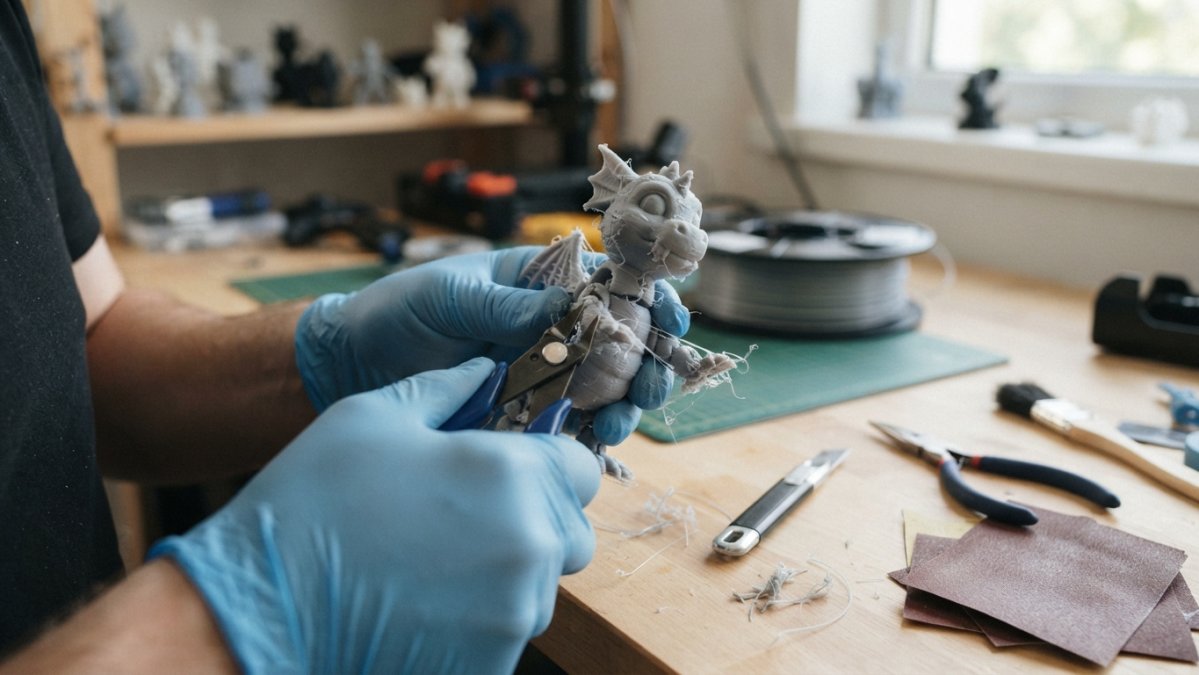
Use flush cutters to clip strings close to the surface. Cut from the side, not straight on, so you do not gouge the model. Next, slice away the brim with a hobby knife. Keep the blade angled away from your body and your fingers.
Sharp edges are the last trim item. Run a deburring tool along any ridges or burrs. This smooths the edge so it feels safe to handle.
Watch out: Cutting with the blade pointed toward your hand is the most common injury when trimming prints. Always cut away from yourself.
How to Clean 3D Prints PLA Without Damaging the Surface
PLA is the easiest material to clean. It is firm, holds detail well, and does not melt in warm water. That makes it forgiving for a beginner.
Start with a dry clean. Use a soft brush to remove dust and loose debris. If the surface still has oil from fingers or residue from the print bed, wash it. Fill a bowl with warm water and a few drops of mild dish soap. Soak the part for a few minutes, then scrub gently with a soft brush.
Rinse the print under clean water. Pat it dry with a lint-free cloth and let it air dry fully before sanding or painting.
For PLA, avoid these mistakes:
- Using harsh solvents, which can dull or soften the surface
- Scrubbing with stiff brushes, which can scratch fine detail
- Leaving wet parts in direct sun, which can warp thin edges
How to Clean Up 3D Prints PETG and Resin Residue
PETG and resin prints both leave residue, but they need separate workflows. PETG is an FDM material that you clean with soap and water. Resin prints are washed in solvent before curing, and that wash step carries safety and waste rules you should plan for before you start.
Cleaning PETG prints
PETG is tougher and more flexible than PLA, and it tends to leave stringy residue and a slightly tacky surface. Wash it the same way as PLA, but scrub a bit more to lift the grime. Use a soft brush and warm water with a few drops of mild dish soap, then rinse and dry completely. Avoid harsh solvents on PETG; they can cloud the surface or soften thin walls. Do not leave PETG parts in hot water or direct sun, because the material softens at lower temperatures than PLA and thin sections can warp.
Washing resin prints
Resin prints come off the build plate coated in uncured resin. That resin is sticky, and it must be removed before the part can be cured or finished. A common approach is a two-bath wash in isopropyl alcohol (IPA), using a high concentration of alcohol because it carries less water and evaporates faster.
- Wear nitrile gloves and work in a ventilated area away from food and drink.
- Place the print in a sealed container with fresh IPA. Gently agitate for about two to three minutes. Do not scrub hard, because uncured resin is soft and detail can smear.
- Move the part to a second container of clean IPA for a shorter rinse, roughly one minute, to remove what the first bath loosened.
- Let the part air dry fully before curing under UV light. Trapped alcohol can leave a cloudy surface or interfere with the cure.
A common pattern is to keep the first bath as the "dirty" bath and the second as the "clean" bath, replacing the dirty bath when it becomes visibly clouded with resin.
Watch out: uncured resin can cause skin sensitization, so keep it off your skin, wear gloves at every step, and keep containers closed to limit fumes.
Handling wash water and resin waste
Used IPA and uncured resin are not drain-safe. Collect used alcohol and resin waste in a labeled, closed container. A common approach is to let the resin settle, then cure the sludge by leaving it in sunlight or under a UV lamp until it is solid, and dispose of the cured solid as household hazardous waste according to your local rules. Never pour used IPA or liquid resin down a drain. Keep resin waste away from children and pets, and store it in a container that will not be mistaken for a drink.
Sanding, Deburring, and Preparing Parts for Paint
Once a part is clean and dry, you can refine its surface. Sanding removes layer lines and rough spots. Start with coarser sandpaper, around 220 grit, and move to a finer grit like 400 for a smoother finish.
Sand in light, even strokes. Wipe away the sanding dust with a dry cloth before checking your work. Deburring can also be done at this stage to catch any remaining sharp edges.
If you plan to paint, start with a clean surface. Fingerprints and oils can cause paint to bead or peel, so wipe the part with a clean cloth. A light primer coat helps paint stick and hides small surface flaws.
Troubleshooting a Clean Print and Your Next Step
Most cleaning problems have a specific cause, and the fix depends on which defect you are looking at. Use the checks below to identify the issue before you change your process.
Quality checks before you finish
Run your fingers over the surface and look at it under bright light from a low angle. A clean print feels smooth, looks even, and has no sticky spots. Check support contact points, hollow areas, and the underside of overhangs, where residue and support scars tend to hide. For resin parts, look for a glossy or tacky patch, which signals uncured resin still on the surface.
Common defects and fixes
- Cloudy or dull surface after washing: the part likely needs a longer dry time, or the wash alcohol was too contaminated. Dry fully and, for resin, move to a fresh second bath.
- Sticky spots on a resin print: uncured resin remains. Rewash in clean IPA and dry before curing again.
- White haze or bloom on FDM parts: often soap residue or hard-water minerals left after rinsing. Rinse with clean water and dry with a lint-free cloth.
- Deep sanding scratches: you skipped a grit. Go back to a coarser grit, sand evenly, and work up through the sequence again rather than sanding harder at the fine grit.
- Support scars or pits: trim flush with cutters, then fill or sand the area before painting. A light primer coat helps hide small flaws.
- Paint beading or peeling: oil or dust remains on the surface. Wipe with a clean cloth and, for FDM parts, a light wipe with IPA before priming.
- Warped thin edges after washing: the part was left in hot water or direct sun. Reshape while warm or reprint with thicker walls.
Your next step
Your next step depends on what you plan to do with the piece. Display figures can be finished with a clear coat. Pieces that will be handled often may benefit from a light sealant. When you are ready to choose designs for display, our articulated figures are a good place to start.
Use this table to match each common cleaning defect to its likely cause and fix.
| Problem | Cause | Fix |
|---|---|---|
| Cloudy or dull surface after washing | Part not fully dry or contaminated alcohol | Dry fully; use a fresh second bath for resin |
| Sticky spots on resin print | Uncured resin remains | Rewash in clean IPA and dry before curing |
| White haze on FDM parts | Soap residue or hard-water minerals | Rinse with clean water and dry with a lint-free cloth |
| Deep sanding scratches | Skipped grit | Return to coarser grit and work up in sequence |
| Support scars or pits | Support contact points left after trimming | Trim flush, then fill or sand before painting |
| Paint beading or peeling | Oil or dust on surface | Wipe with clean cloth; light IPA wipe for FDM parts |
| Warped thin edges after washing | Part left in hot water or direct sun | Reshape while warm or reprint with thicker walls |
Frequently Asked Questions
How do you clean a 3D print without damaging it?
Work gently and in stages. Remove supports and strings with flush cutters or nippers, then smooth edges with fine sandpaper or a deburring tool rather than forcing material off. Wash the part in warm soapy water with a soft brush to lift dust and finger oils, and avoid harsh solvents on fragile or thin features. Let the part dry fully before checking the surface. Test any new cleaning method on a spare or hidden area first to confirm it does not dull or soften the finish.
What tools do you need to clean up a 3D print?
Most cleanup needs a short list of basic tools: flush cutters or nippers for trimming strings and brims, a deburring tool or hobby knife for sharp edges, sandpaper in a few grits for layer lines, a soft brush, warm soapy water, and lint-free cloths. Resin prints also need isopropyl alcohol and a container for washing, plus gloves and good ventilation. Keep tools dedicated to printing so they do not pick up contaminants from other projects.
Can you wash a 3D-printed object with soap and water?
For most PLA and PETG parts, warm water with a mild dish soap is a safe first wash. It removes dust, finger oils, and loose debris without affecting the material. Scrub gently with a soft brush and rinse thoroughly. Do not soak parts for long periods, and let them dry completely before painting or handling. Resin prints are different: they need isopropyl alcohol to remove uncured resin, followed by a water rinse and full curing.
How do you remove supports from a 3D print?
Let the print cool, then flex support material gently away from the model using your fingers or a scraper. Cut away stubborn connection points with flush cutters, working slowly so you do not gouge the surface. For fine supports, a hobby knife can help clean leftover nubs. Expect small marks where supports attached, and sand those spots lightly if you want a smoother finish.
